Around 3200 Rss Feed readers​​ Already joined, Have you?
Showing posts with label Blogging Tools and Services. Show all posts

How to Make Your Blog Load Faster than ProBlogger

Saturday, June 11, 2011

This guest post is by Devesh of WP Kube.
If you’re regular reader, you know that how much time problogger.net takes to load. Would you like to make your blog load faster than ProBlogger? Today I’m going to share eight simple tips to increase your blog speed. But first, you’ll need to know how quickly your blog is loading right now.

How to test your blog’s speed

So you can do a before-and-after comparison, take a moment to check how quickly your blog is loading now.
There are many tools online that let you test load speed, but I prefer to compare the loading speed of my blog against others—after all, that’s what your users will do.
One of my favorite tools for loading comparisons between two sites is WhichloadsFaster. To check your blog’s loading speed against a competing blog or a major website that’s used by readers in your niche, enter your site’s URL and that of the other site into the two boxes provided. Simple!
Here are the results of the loading speed comparison between my site and ProBlogger:
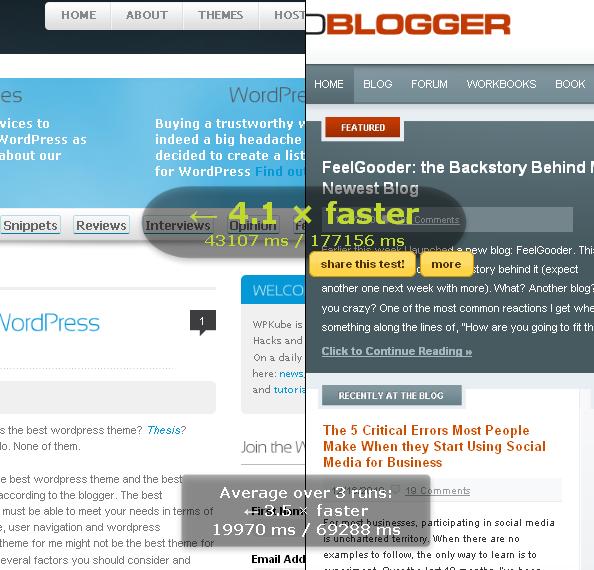
Comparing site load times

How to speed up your blog

Now that you know how your site’s loading in comparison to another, let’s look at the ways you can speed up your site’s load time.

Choose an efficient theme

Many bloggers make the mistake of choosing a free theme, or one that’s not properly coded. In my experience, every blogger should go for premium themes like Genesis, Thesis, or WooThemes. Premium themes tend to be much more carefully coded than free ones—Themeforest, for example, has some good themes, but many of the them aren’t well coded.

Review your hosting

Hosting plays an important role in your blog’s loading speed. Many new bloggers ignore this, but adjusting hosting can have a big impact on increasing your blog speed. Specifically, if you use shared hosting for your blog, you might want to look into switching to dedicated or grid hosting, as shared hosting can slow down load times when the demands on the shared server are high.

Remove extra widgets and plugins

This is one of the easiest things you can do to reduce your site’s load times. The more plugins you have on your blog, the longer it can take to load. Remove any extra widgets and plugins you’re using on your blog, which aren’t strictly necessary, and see what happens to your load time. Hand-code your functionality, and place it directly into the WordPress theme: this will reducing the number of calls each page load makes on the server.

Use the WordPress W3 Total Cache plugin

Now that you’ve reduced the number of plugins you’re using there’s one you should add! W3 Total Cache is a must-have plugin for any WordPress user. W3 Total Cache is a static caching plugin that generates HTML files that are served directly by Apache, without processing comparatively heavy PHP scripts. It’s compatible with most servers and server configurations, and gives you the choice of creating the cache on your own server, or using a content delivery network.

Use a content delivery network (CDN)

A CDN is a network of optimized servers around the world that store copies of your site’s data. By making your site available from various servers, the CDN maximizes bandwidth, and reduces your site’s load time. Using a CDN works really well if you have visitors from all over the world, as the servers closest to each user will be used to deliver content quickly. A CDN provider such as MaxCDN can provide great performance without putting a strain on your pocket.

Optimize your blog images

Many blogers don’t focus on optimizing blog images, but it’s a very effective way to increase your blog’s loading speed. There are many, many plugins that can help you to optimize blog images, but one of the best is WP Smush.it. I’m using it on many of my blogs and it really helps to make blog load faster. It offers an API that performs these optimizations (except for stripping JPEG metadata) automatically, and it integrates seamlessly with WordPress. Every image you add to a page or post will be automatically run through Smush.it behind the scenes—you don’t have to do anything differently.
This plugin:
  • strips meta data from JPEGs
  • optimizes JPEG compression
  • converts certain GIFs to indexed PNGs
  • strips the unused colours from indexed images.

Use social images instead of buttons

Social network buttons were among my site’s main problems: they take so much time to load, and can really slow your blog down. Displaying three or four buttons might be okay, but if you want to show all the buttons, I’d suggest you use images instead. Using images is the best way to show all the buttons without using a plugin.
These are eight simple tips that can help you to make your blog load faster then ProBlogger. What others can you share?
Devesh is young entrepreneur and part time blogger. Visit WP Kube for WordPress Tuorials & Hacks and Technshare for Make Money Blogging
Tips.
Read More - How to Make Your Blog Load Faster than ProBlogger

My 5 Favorite, but Often Ignored, Analytics Features

This post was written by the Web Marketing Ninja—a professional online marketer for a major web brand, who’s sharing his tips undercover here at ProBlogger. Curious? So are we!
The wonderful thing about working online is that our work is just so measurable.
In just about every other industry, a lot of decisions are based on sample data, or assumptions, or just on gut feel. But online, we can measure just about everything for 95%+ of our visitors—yay for us!
In our world of pretty graphs and statistics, we have are a stack of options to ensure we’ve got our eyes on the numbers. But when it comes to bang for buck (i.e. lots of value for no outlay) there really is no equal, in my opinion, to Google Analytics—and it just keeps getting better.
I’m sure a lot of you are already feeling the Google love with Analytics—and if you’re an addict like me, you’re using it on a daily basis. So I thought I’d share my five favorite, but often ignored, features of Google Analytics.

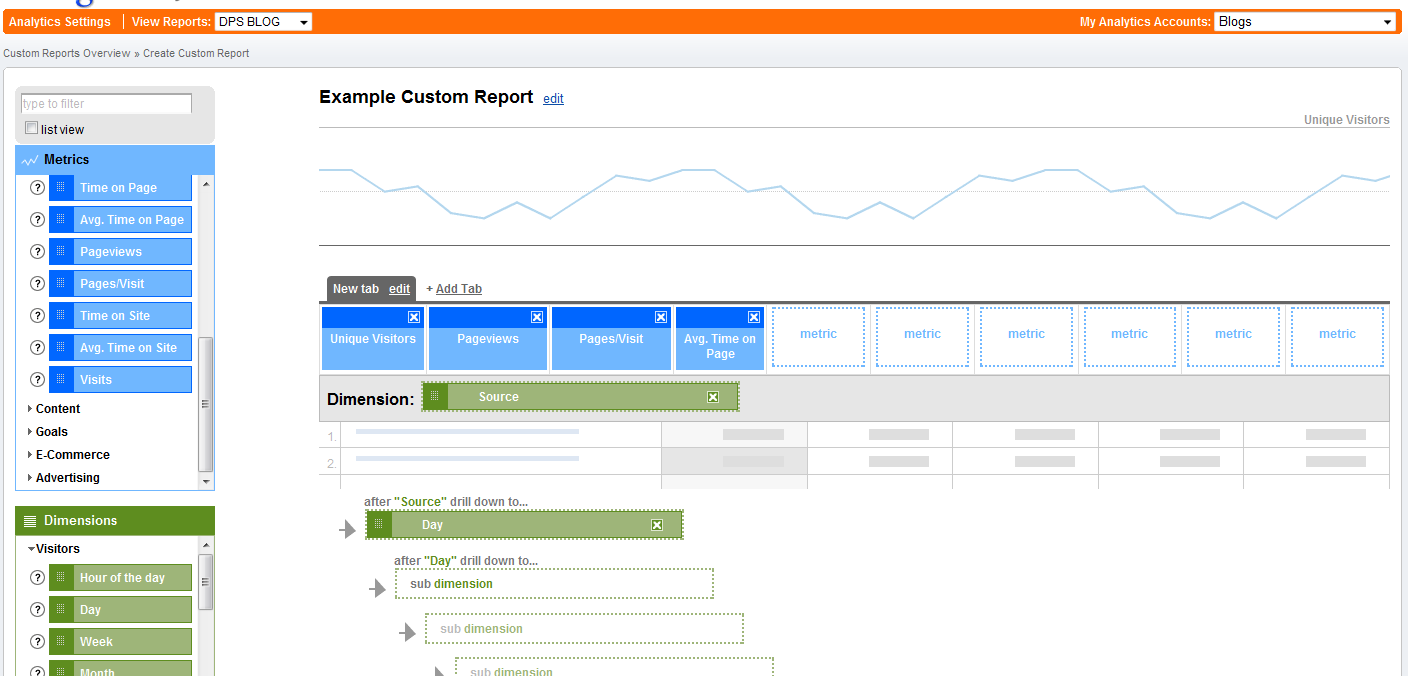
1. Custom Reports

There are so many levels, layers, and measures in the Google Analytics interface that I often used to waste time attempting to find my first stop in the system: reports.

Custom Reports changed that. Not only does this feature allow for a myriad of different perspectives and data, but you can also save each report and head back to it at a moment’s notice. This video is a good starting point to understanding how to make the most of custom reports.

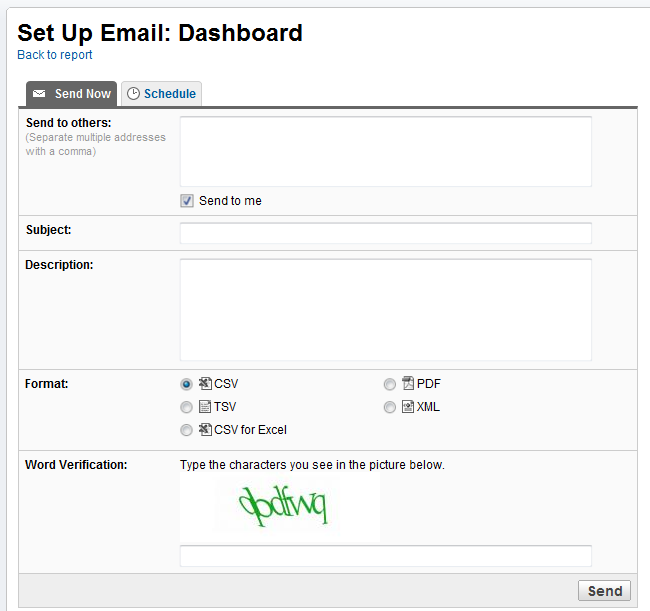
2. Scheduled Reports

Actually remembering to jump into Analytics to make sure you’re across everything can be a challenge. Scheduled Reports make the job much easier.
You’ll probably have certain reports you’ll look at more often than others. If you click on the little email icon on the top-right of a report, you’ll be able to set up a schedule so that that report’s delivered to you via the inbox.
This is a great way to ensure that your busy schedule is not getting in the way of you knowing what’s happening on your site.

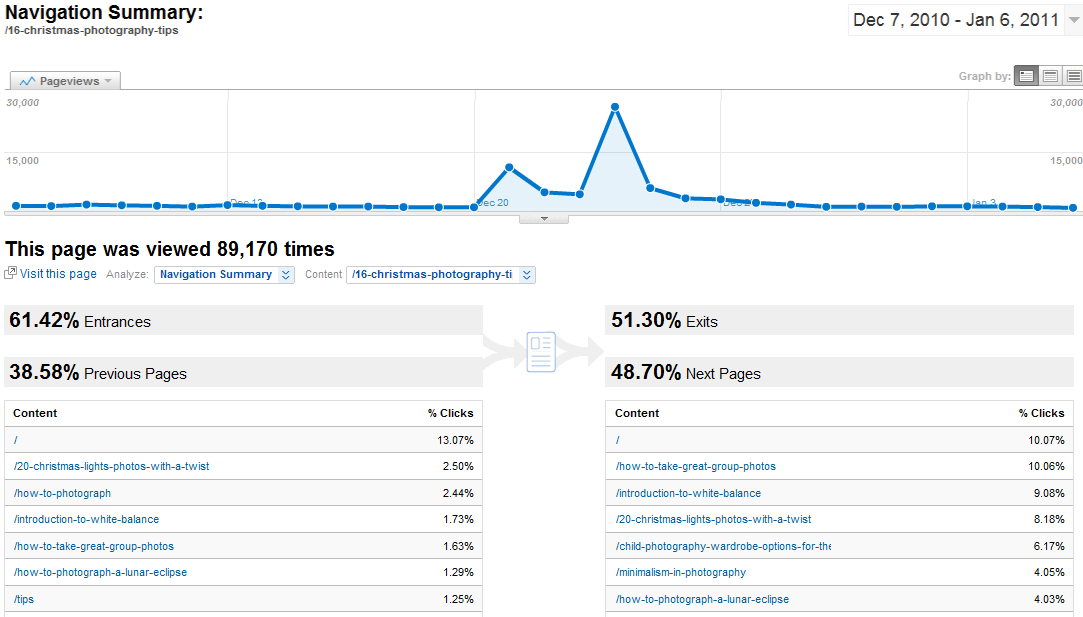
3. Navigational Summary

In December I wrote about the concept of sales funnels, and a lot of you asked how on Earth you can manage to measure all those steps. Well, the Navigational Summary report will get you started.
It covers the essential details for each page view, including where the user came from (another page, external site), and then where they went to (exit, another page)—plus everything in between. This is a key report to start understanding browsing behaviors on your critical pages. You can access the navigational summary through the Content section. I tend to use the Content Drilldown report to find the specific pages I’m after, then click the Navigational Summary for their specific metrics.

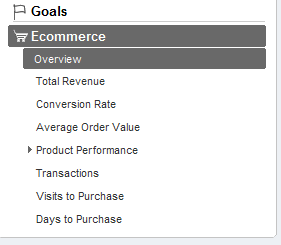
4. eCommerce and the $ Index

When you set up ecommerce tracking in Google Analytics, you open up a whole new world of insight. It’s a feature that’s only useful for those selling online, but it’s scarily accurate and amazingly insightful.
Goals Overview
With eCommerce set up, not only can you see reports on the products you’re selling, and how much money you’re earning, but you can also start to track them back to other pages in your site. You might find that particular types of blog post generate more revenue per page view—and that’s where the $ Index kicks in.
With this metric you’ll know the average income per visit to each page or collection of pages on your site. Unfortunately setting this up is not straightforward, and you might need a little help. There’s a good article on the Analytics blog that will help get you moving. Sorry I can’t show a good screen shot of this—the information was too sensitive for the other sites I have access to.

5. Goals and Funnels

Almost all websites have some sort of desired visitor action. It might be to buy something, to fill out a contact form, to download a sample, or even just look at a bunch of other pages. Setting up goals in Google allows you to track these goals like a fox. You get insight into the overall performance of your site, but you can also track back every step of the way.
Unfortunately, like eCommerce, this feature can be a little tricky to set up and is something you might wish to get help with. I won’t go into too much detail on how to do this—it’s all covered on the Analytics blog.

Warning: Analytics is Like Quicksand

I often tell people that Google Analytics is a little like quick sand. Once you make that first step, it starts to really suck you in, and a short time later you’re stuck for good. More time passes and all of a sudden your head goes under—everything goes dark and you have no idea where you are.
It’s at that point that too many people go back to assumptions and guesswork, murmuring something about leaving “all that statistics guff” to the eggheads. If you’ve fallen into the Analytics quicksand, my recommendation is to keep things simple. Identify ten key metrics you want to measure, create a report or set of reports that deliver you those metrics, and review them over time. Once you’re comfortable, move a little deeper.
The more you understand about your business, the better-informed decisions you can make—and it’s the decisions that will make or break your business, not the numbers.
As I mentioned, Google Analytics in my favorite stats package, but I’d love to hear about any other stats packages you’re using and how you’re finding them in the comments. Or perhaps you can highlight your favorite functions of Googe Analytics that I’ve not covered…
Stay tuned from most posts by the secretive Web Marketing Ninja—a professional online marketer for a major web brand, who’s sharing his tips undercover here at ProBlogger.
Read More - My 5 Favorite, but Often Ignored, Analytics Features